Wheat is one of those items in Minecraft that you can never get enough of. It is not only used in many crafting recipes, but also helps feed livestock. So, having a lot of wheat in your inventory can’t hurt. We’ve already covered a lot of amazing farm designs , and today, we’ll be adding another one to the growing collection with this wheat farm. Get ready, because we’re about to teach you how to build an automatic wheat farm in Minecraft.
Resources required to build a wheat farm
In this guide, we will only create an automated wheat farm. If a manual farm better suits your needs, follow our guide on how to grow crops in Minecraft , where we show you a simple way to grow crops without automation.
Now that’s over, let’s take a look at everything you need for an automated wheat farm:
- 1 villager
- about 45 regular trains
- 11 Redstone Torches
- 2 hoppers
- 2 chests
- 1 Hopper Minecart
- 81 Dirt
- some concrete blocks
- 1 of any complete light source block (Jack O’Lantern in the guide)
- 1 Compost
- 8 trapdoors (any)
- About 592 wheat seeds (about 9 stacks)
- 1 stone (minimum)
Make an Automatic Wheat Farm in Minecraft
Once you have the necessary resources, follow the steps below to create a wheat farm. This is a pretty small farm, but you can easily expand it if you need more resources.
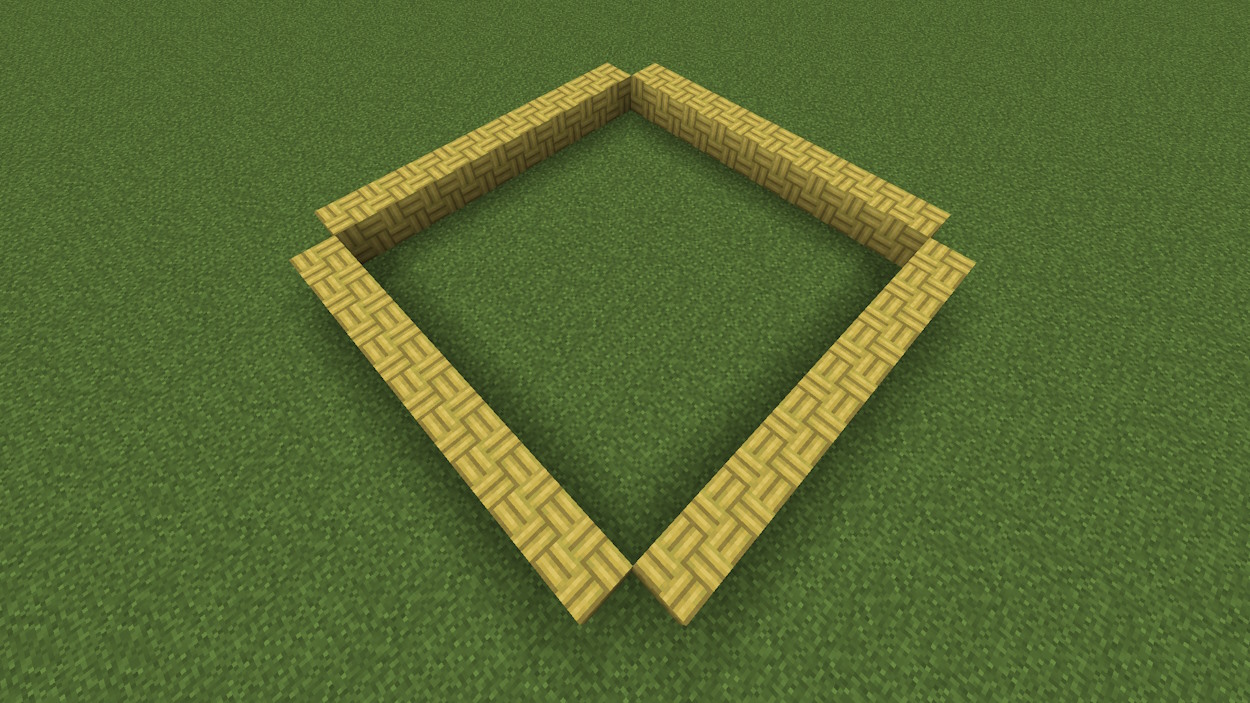
1. Collection system
- Enclose a 9×9 block area by building a one block high wall of your building blocks.
- In the center of the 9×9 area, dig a hole one block wide, 9 blocks long, and two blocks deep that is starch from one end to the other. Place 9 redstone torches in that hole.
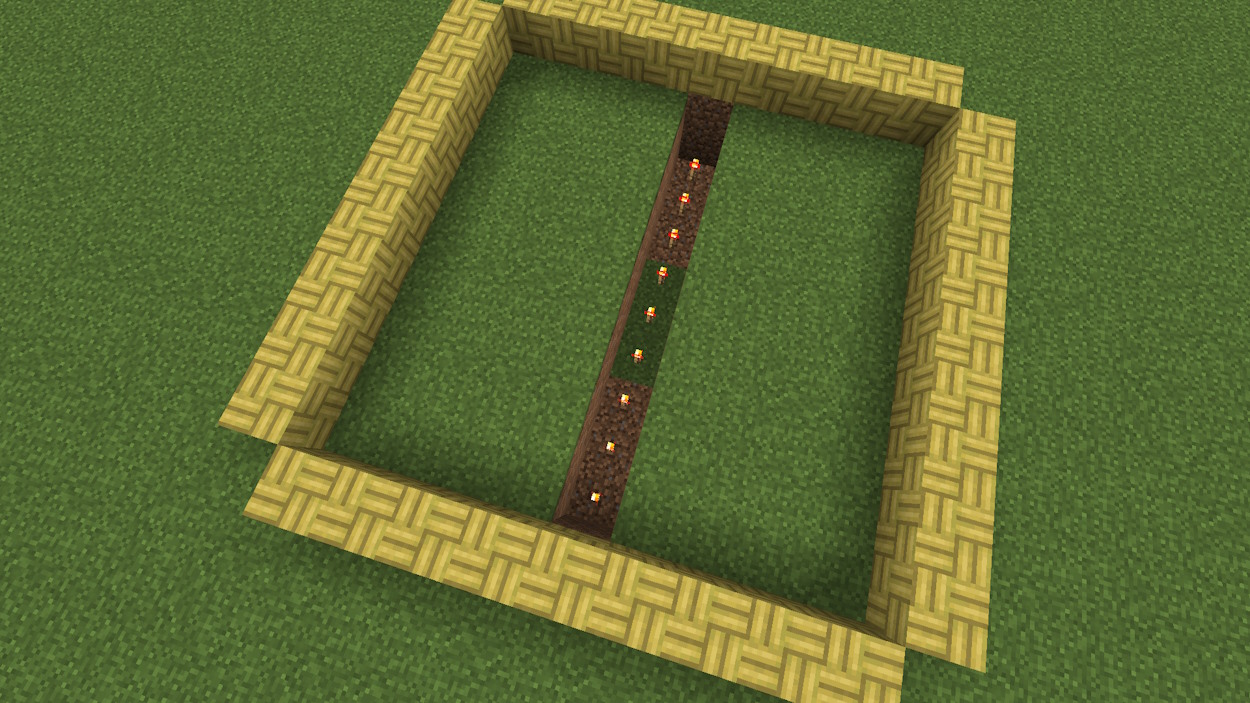
- Then, place soil blocks on top of the redstone torches, making the area level again.
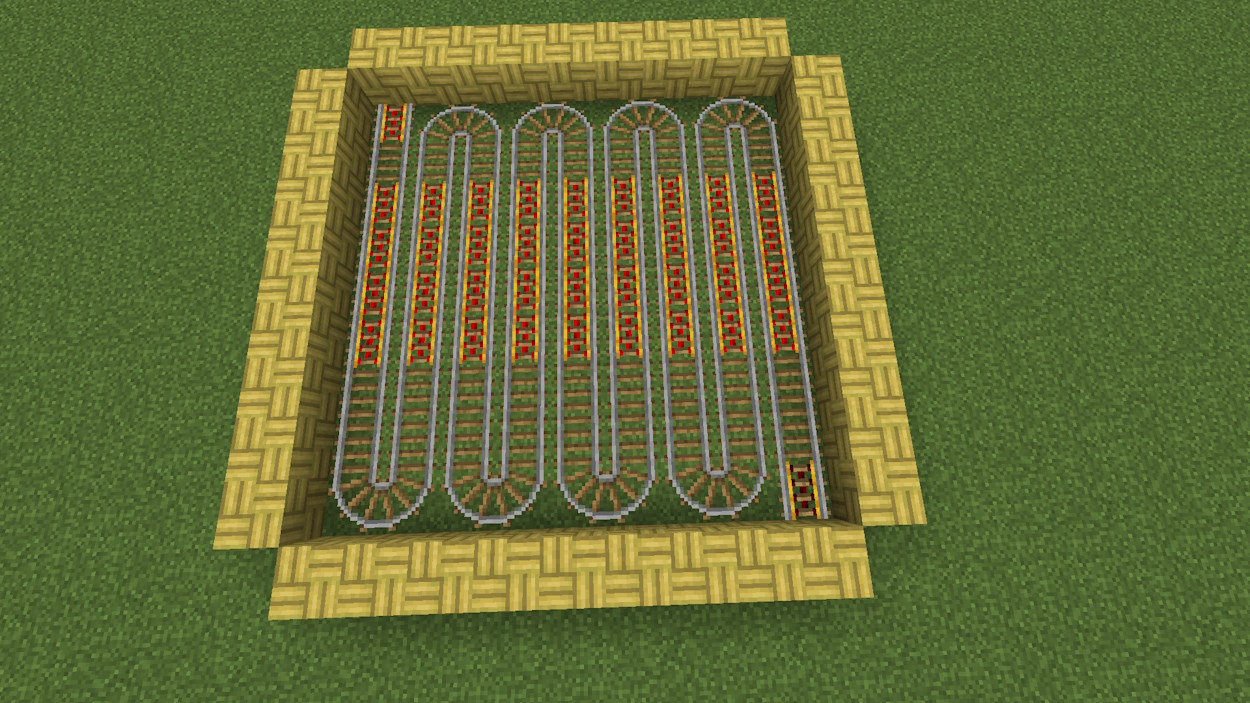
- Go to one corner of the area and place the powered rail towards one of the blocks. Connect it with some regular rails in Minecraft.
- After that, place four powered rails leading to the other end. You should see them powered thanks to the redstone torches underneath.
- Then, place more regular rails at the corner. When you get to the block next to the powered rails, start replacing the regular rails with them, so that there are 4 more powered rails. You should then alternate between the regular and powered rails so that the powered rails are next to each other in 4 connected groups.
- When you reach the end, make sure there is a powered rail facing the solid block. Dig a pit two blocks deep and place a redstone torch beneath it. Then cover the pit with a block of dirt and place the powered rail on top of it. It should stay powered permanently.
- You can probably use a lesser powered rail, just make sure the hopper minecart can travel without stopping.
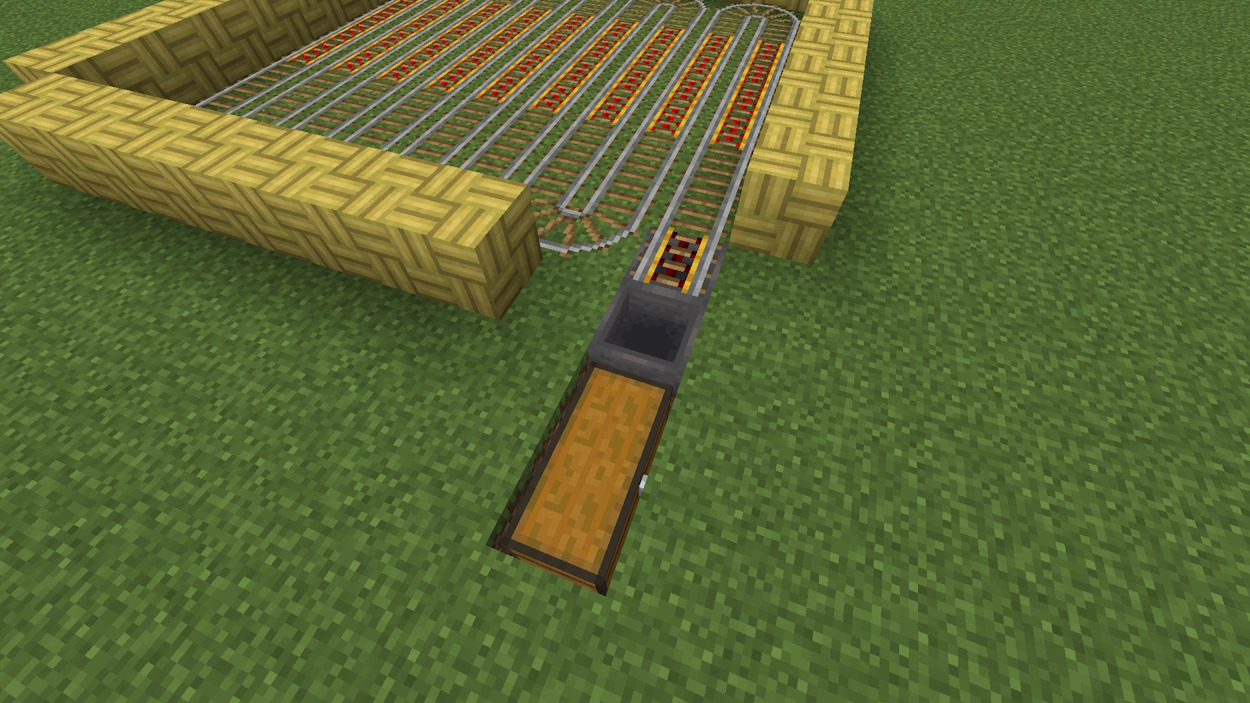
2. Drop-off Station
- Let’s now create a small comparator system that will stop the minecart if it has ingredients inside it.
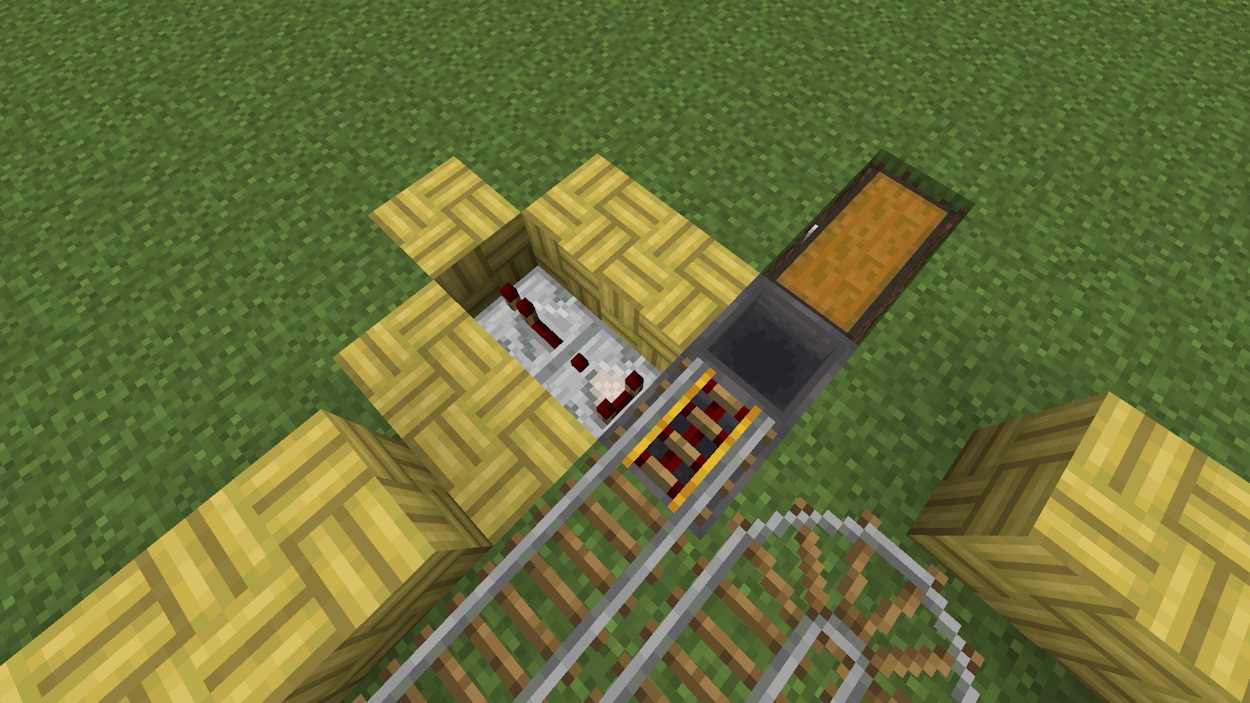
- First, temporarily break the inactive powered rail at one end. Place a hopper underneath that spot so it collides with another hopper that’s connected to a chest.
- Place the powered rail on top of the first hopper, so that it connects to the rest of the rails, like at the beginning.
- Then, dig a hole two blocks long, one block wide, and one block deep next to the hopper, with a powered rail on top of it.
- Place a comparator reading the contents of the hopper and a redstone repeater connected to it facing a solid block.
- If you want to be organized, replace all the surrounding blocks with non-natural blocks so you don’t break up the redstone by mining in that area. It’s okay if you just leave it as soil or grass.
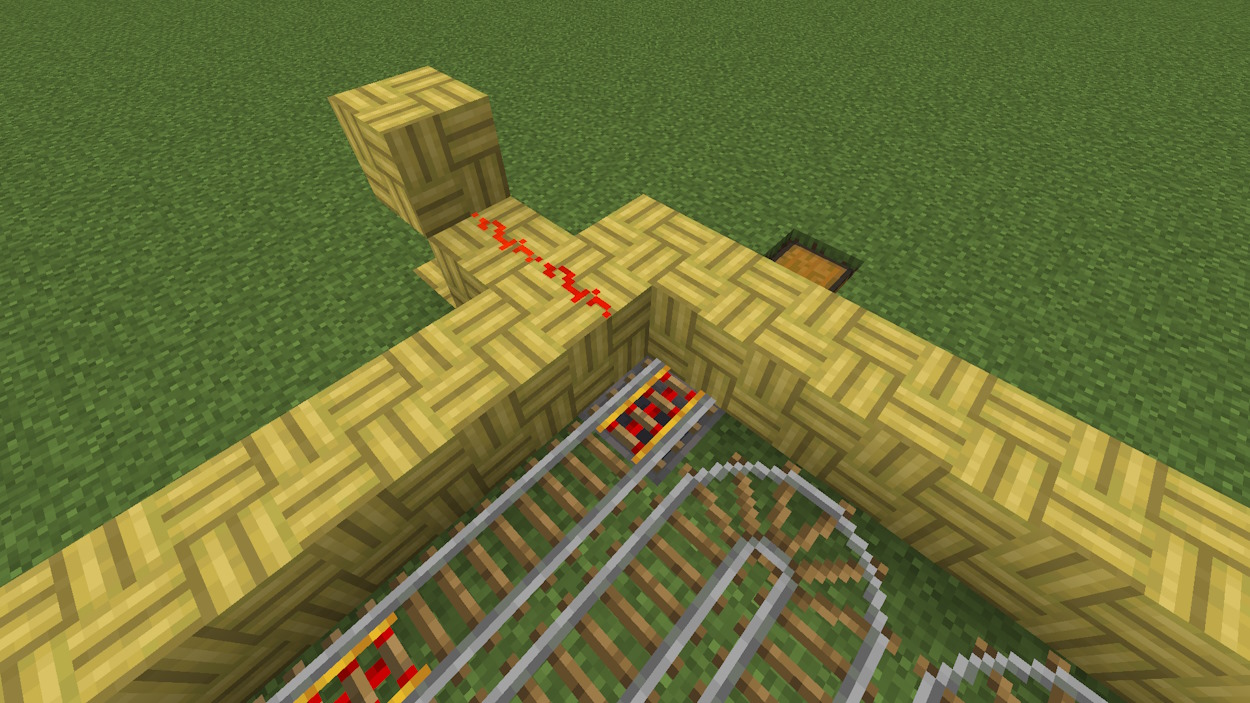
- Next, place a redstone torch on top of the block the repeater is facing, and then place another solid block on top of the torch.
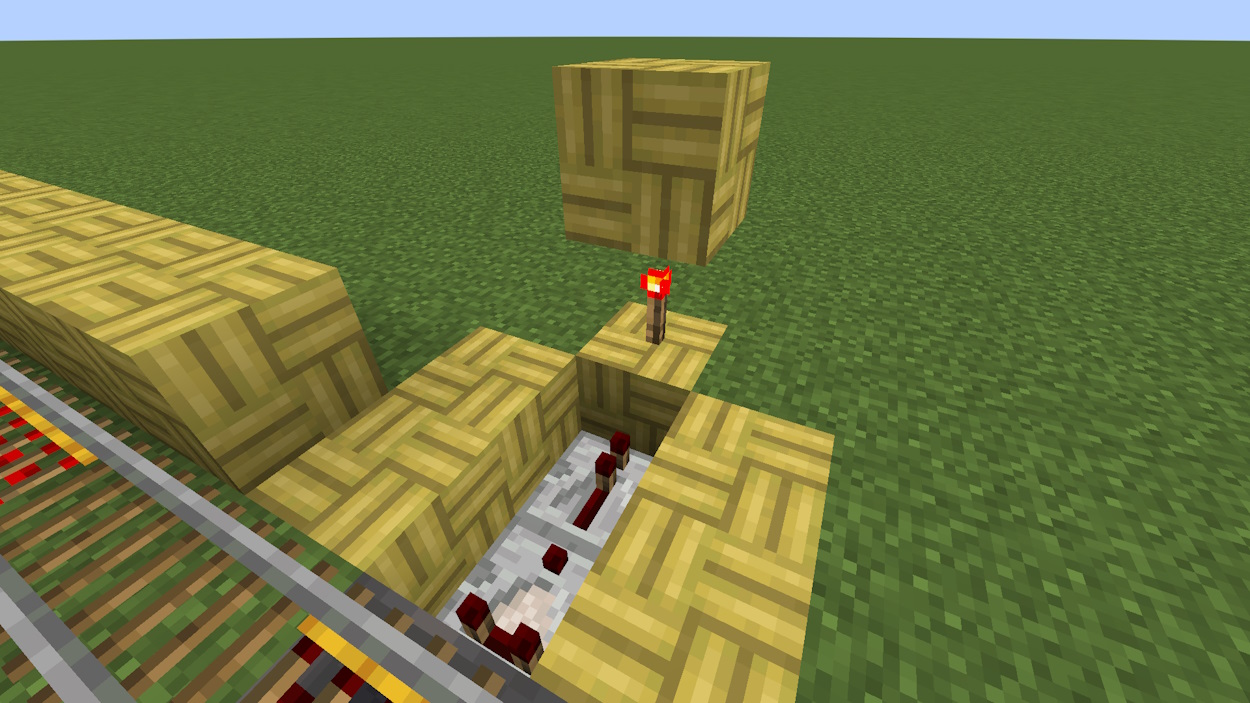
- Then, cover the comparator and repeater with two solid blocks and place redstone dust on top of them. The powered rail should turn on immediately.
- Whenever the hopper underneath the powered rail is full of material, it stops the Minecart from moving forward, causing it to drop all the items it has collected.
- Place the Hopper Minecart on a powered rail, and it will begin circling the farm and picking up all the drops.
3. Main part of the wheat field
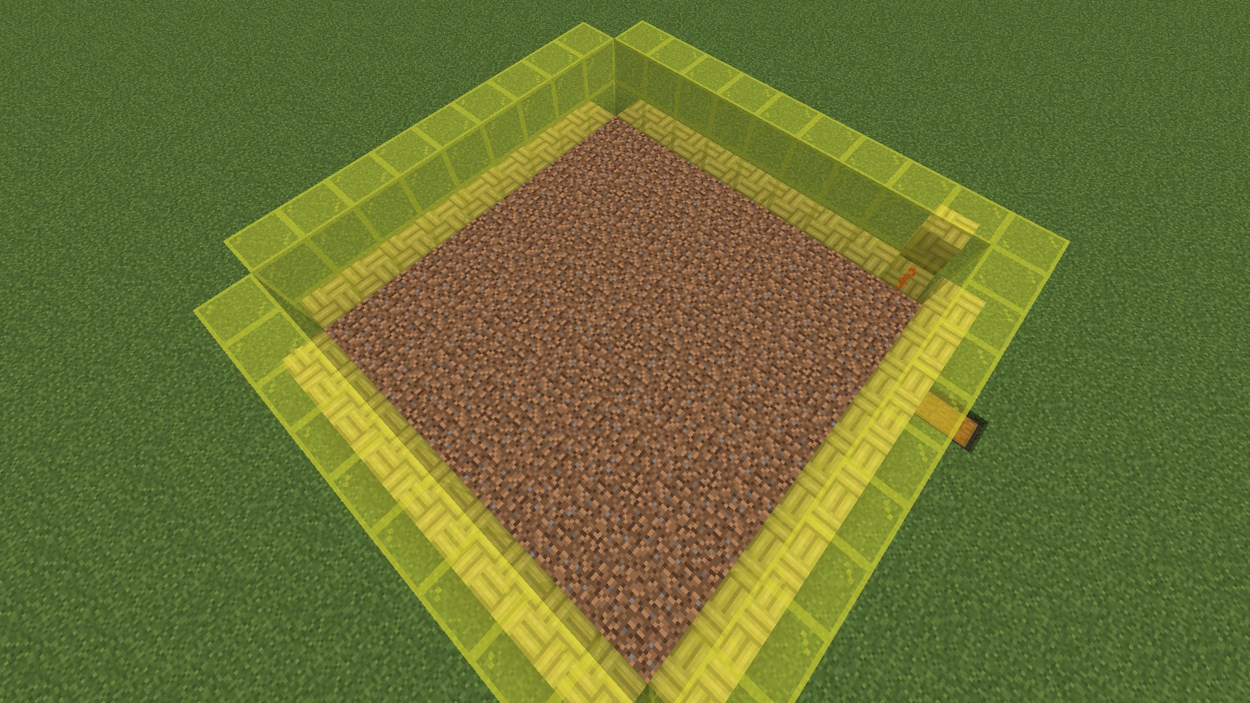
- Then, put soil on all the tracks.
- Then, surround the entire earthen platform with a two block high wall. You can use glass blocks, so you can keep an eye on the farm.
- Break the soil block in the middle of the field. Then, pour water into that hole while looking at the soil block. This is very important, so that you don’t pour the water the wrong way. The railing at the bottom should not fill up with water and should hold the water.
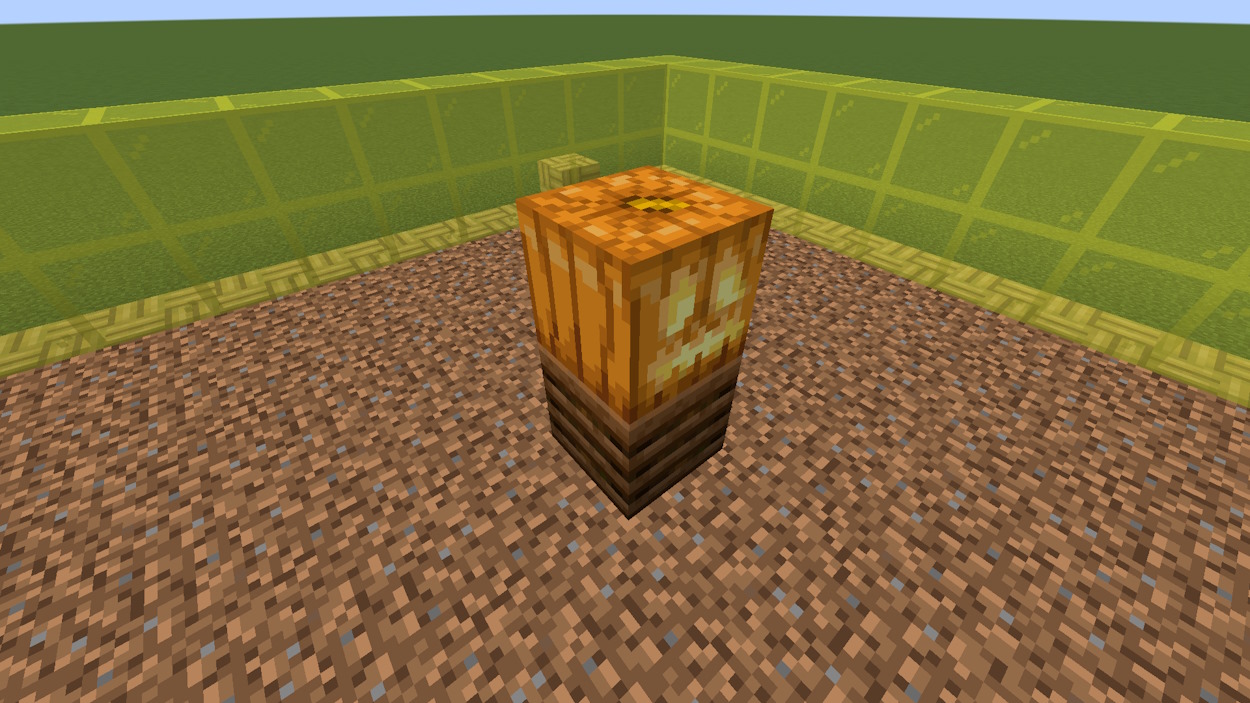
- Next, place a composter over the water, with the help of a temporary block on the edge. Also, place a jack o’lantern on top of the composter.
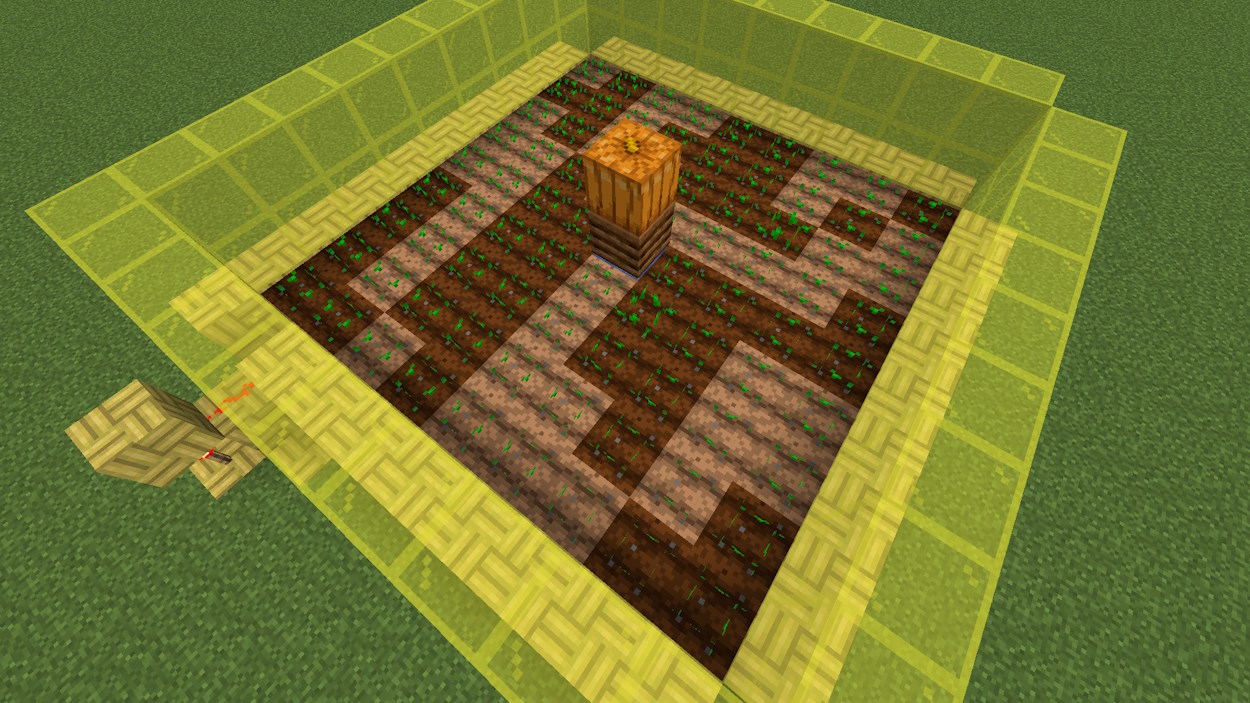
- Then, use the hoe to turn all the soil blocks into tilled soil. You will need at least one stone hoe for this.
- The next step is to sow the wheat seeds.
4. Rural Key Establishment
We have almost completed the construction of the wheat farm. Now all that is left is to bring an unemployed villager inside the farm. They will become a farmer and will be ready to harvest all the wheat.
- To prevent the villagers from taking the wheat, we have to fill their stores with seeds.
- Villagers have 8 hidden inventory slots and will not be able to pick up wheat if their inventory is full.
- This will allow the hopper minecart located below to collect the wheat and any additional wheat seeds.
- Simply go to the farmer and press Ctrl + Q, so you can throw out a whole pile of wheat seeds. You may want to do this before putting the villager into the field, or temporarily disable the minecart by turning off the rails.
Also, if you don’t have enough seeds, you can use the luck Minecraft spell to get extra seeds per harvest.
From time to time, villagers go to the fertilizer maker and make bone powder from these seeds. If this continues, the villager will easily run out of seeds and he will start growing wheat crop.
So, to prevent this, surround the Jack O’Lantern with a trapdoor on the upper half. This will prevent villagers from getting close to the composter .
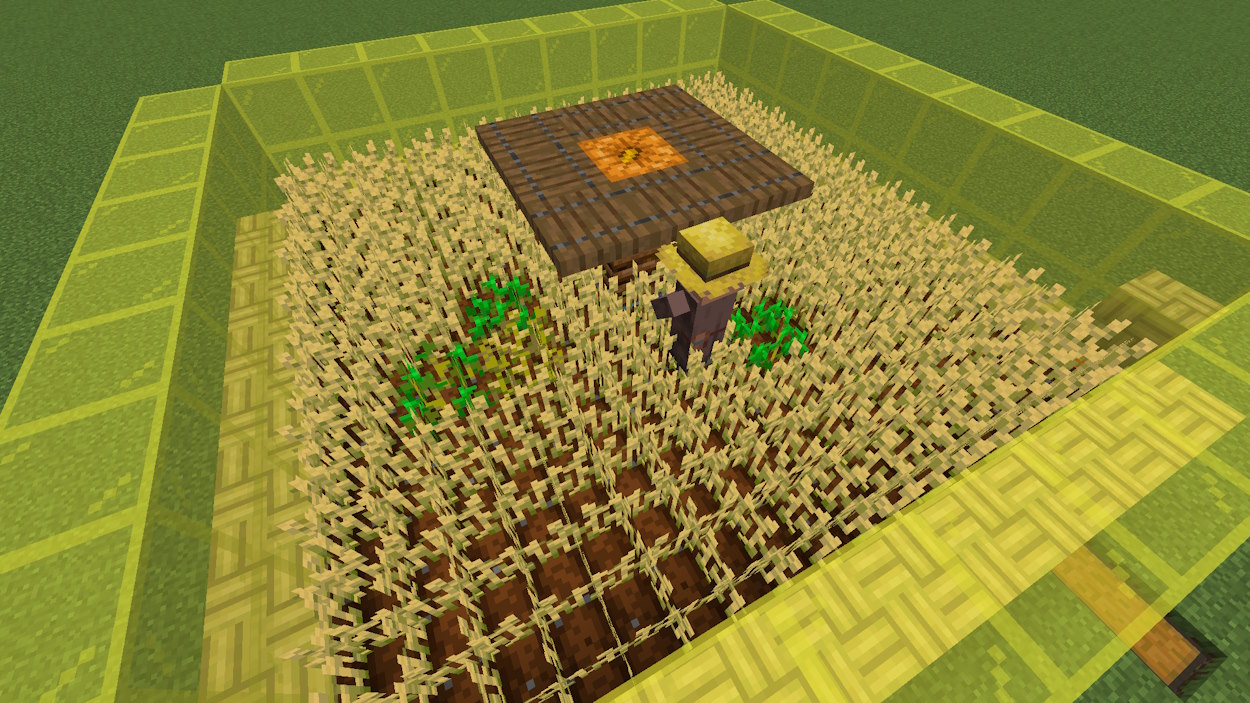
A big sign that a farm is working properly is when villagers leave seeds on the ground. This means they can’t pick them up because their inventory is constantly replenishing.
If you ever feel that the farm is not working, it could be because the villagers ran out of seeds and so they started growing wheat. So, replenish their stock with seeds.
Why should you build a wheat farm?
Wheat is a multi-functional and quite important item in Minecraft. It can be used to make bread, which is one of the easiest food items to find in the early game. In addition, it is also food for some animals such as cows and sheep.
You can breed these animals and get a better source of food and other relevant items like leather and wool. Wheat is also used to make hay bales, which are wonderful decorative blocks that are also food for horses and llamas.
Also, if wheat is mixed with clay in the crafting table, you can make packed clay. This is already a great building block that can then be turned into clay bricks. This is a very cool block that looks great in the block palette with terracotta and jungle wood.
If you’ve reached the end of this guide, congratulations! You now know how to farm wheat. Wheat is a very useful item, so building a farm for it in Minecraft can only help you in the long run. Having said that, what do you think of this farm? Did it help you in your world? Let us and all of our readers know in the comments below!